
Street style is about mixing and matching and feeling comfortable, but most importantly, doing it your way. There is no better way to do it your way than by doing it yourself (DIY)!
It’s time again for another fun DIY tutorial. The best thing about a DIY is that instead of shelling out hard earned cash for a sassy new outfit, you can dig deep in your inspirational bank (read: closet) for something that fits your personal style as if it were tailor made for you.
If you’re like most people, you have tons of tees and jeans that have gone to the back of the closet and rarely see the light of day. But now, armed with some of our tips, a pair of scissors, and bit of an adventurous spirit… you can be a fashion designer for a day.
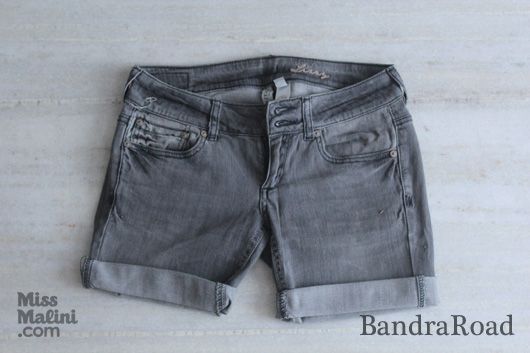
Denim / Jean Shorts:
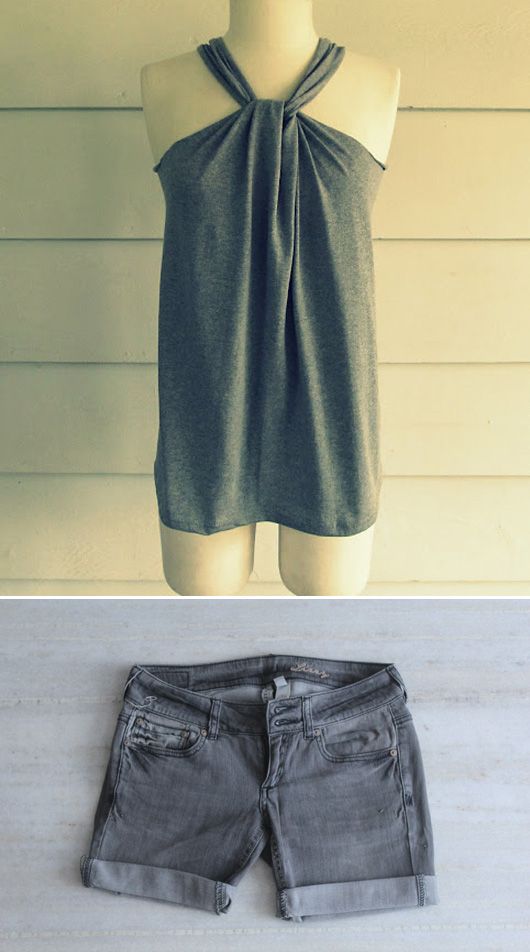
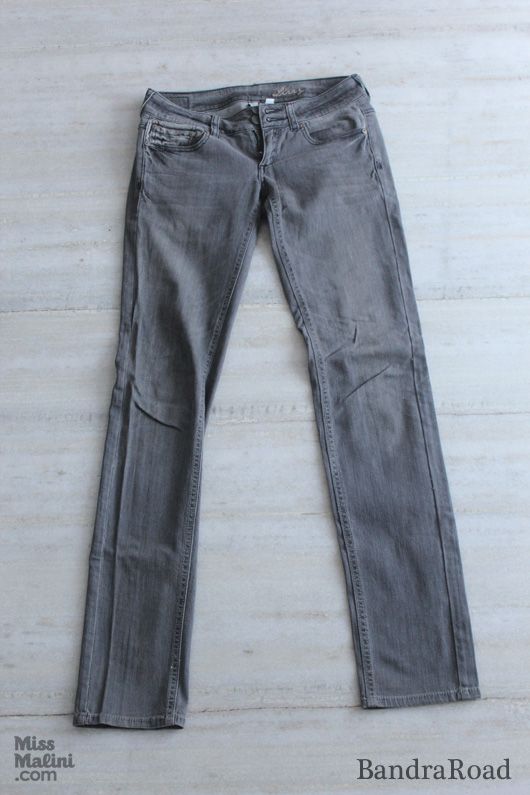
The best fashion items never go out of style and cut-off denim shorts are definitely on the top of my list. The best thing about cut-offs is you really don’t need to ever buy a pair. Just recycle your old jeans that have gone out of circulation.
What you will need:
1) An old pair of denims (Men’s denims are great for a high-waisted look).
2) A measuring tape
3) Chalk (or pen)
4) A sharp pair of scissors
Style Tip: Play around with a couple fits of jeans from the boyfriend, slightly baggy jeans, to the skinny jeans or even khakis.
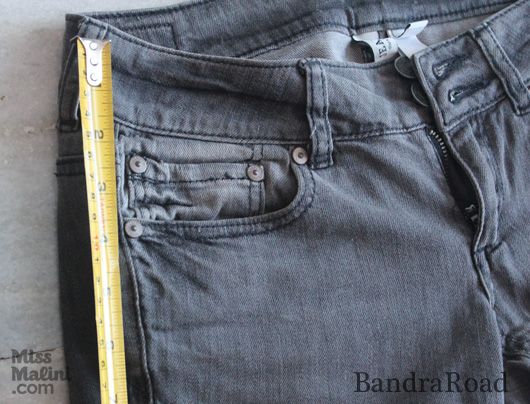
STEP 1
Measure approximately 6 inches from the inseam and use your chalk to make a horizontal line across the pant legs.This may seem a bit long, but its better to cut less at first as you can always cut more.
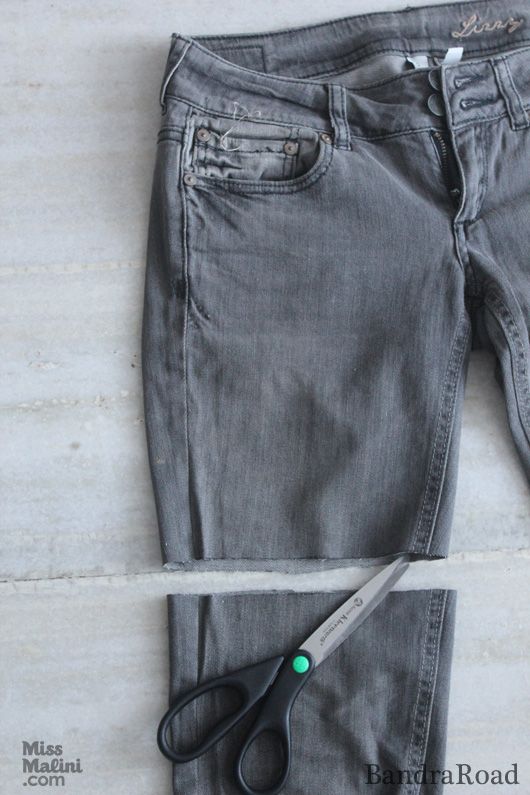
STEP 2
When you’ve got a good idea of the length, simply begin to cut along your chalk marks. I suggest cutting one leg entirely first, on the basis that you might not like the length and want to go shorter. It is very important to keep trying on your jean shorts and get a feel for what length suits your body and taste.
STEP 3
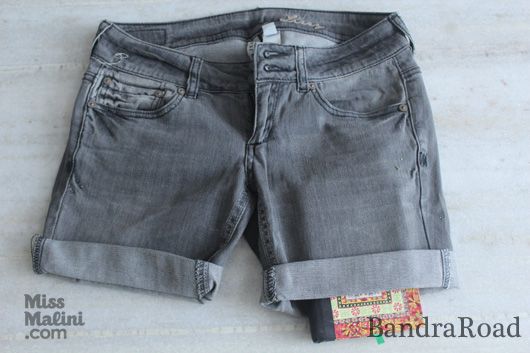
Once satisfied, cut the remaining leg and admire your work. It’s also important here to note that shorts will tend to fray once being cut, so sewing down the cuff will prevent the shorts from any excessive fraying. But again, the beauty of DIYis that you can do whatever you want! You have now successfully turned your old denims into cool shorts.
Style Tip: To create a distressed look, make sure you put something hard in between the legs of the pants, like a hard cover book or a piece of wood. In this case I’ve used a book. Use either sandpaper or a pair of scissors to aggressively rub in the area you want to create the worn in or slightly ripped look.
Old T-Shirt Into A Halter Dress

There are so many cool things you can do with an old t-shirt. You can cut the sleeves and collar to make a cool tank top or cut the length of the tee short, to transform it into a crop top. But this one is definitely on top of my list.
What you need:
1) Oversized Tee
2) Chalk
3) Scissors
STEP 1
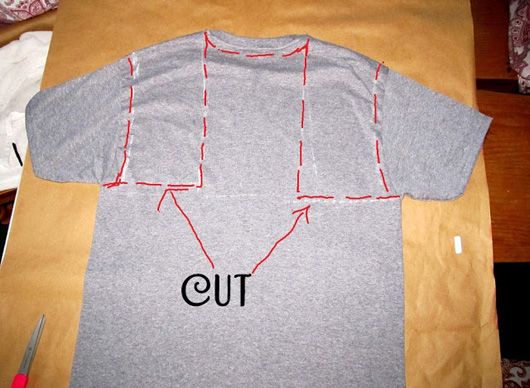
Lay your t-shirt down, front facing up on a flat surface like a table or floor. Take the chalk and mark the outlines for where you want to cut.

STEP 2
Turn the t-shirt around and mark the outlines again with a chalk. It’s important to note that you should not cut along the top of the shoulder.
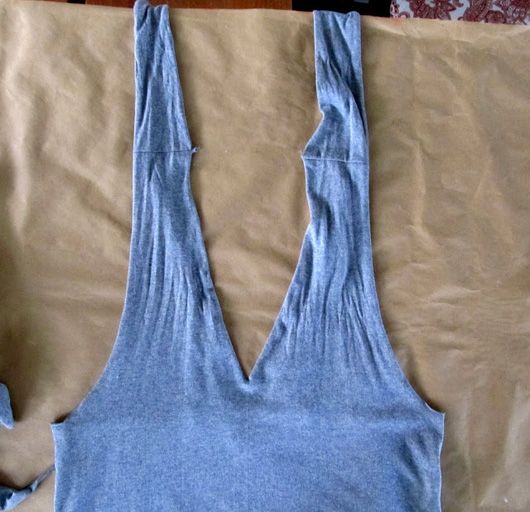
STEP 3
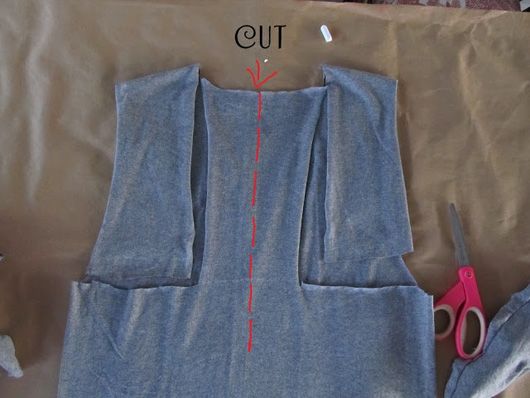
Step 4
*Note -To achieve this look you should cut in one continuous line from front to back.
Step 5
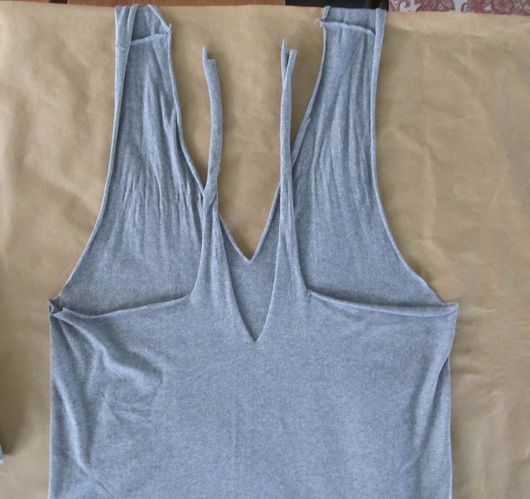
Step 6
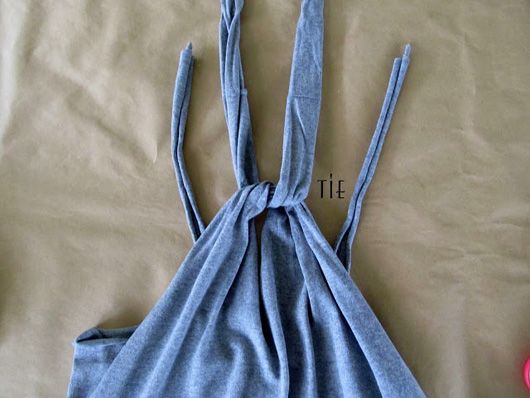
Step 7

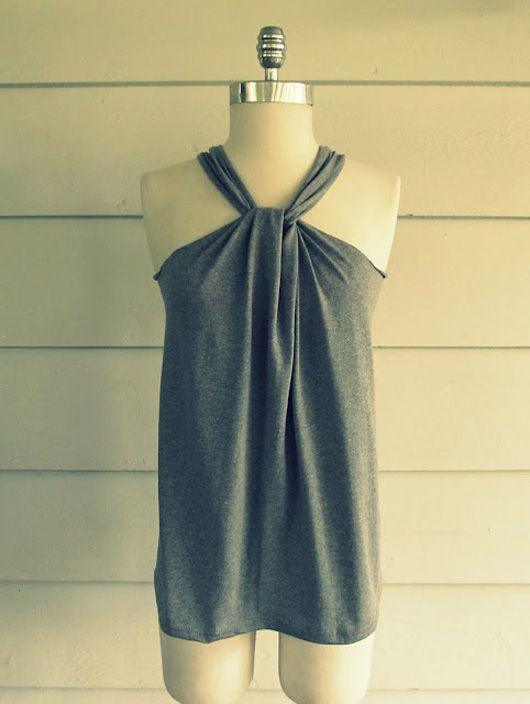
Admire your work.
DIY projects are fun, economical and a great way to recycle your wardrobe and create new pieces. And you could possibly build a whole new wardrobe this way!
We hope you had fun learning these cool tricks.
Share your DIY fashion tips and pictures by #BandraRoad or @BandraRoad on social media. If you’re a bit shy, then send us your pictures via email to bandraroad@gmail.com.