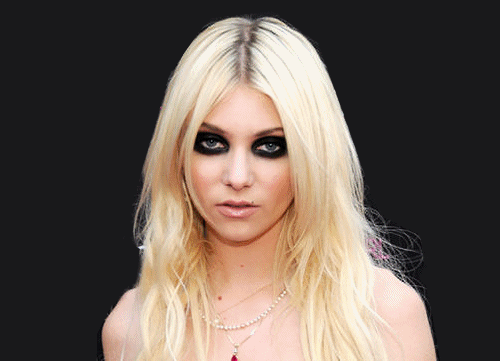
Sultry, yet glamorous, smoky eyes are a classic for a reason. However, if done wrong, you could look less like a diva and more like a raccoon. To ensure that your smoky eye is nothing less than perfect, we’ve listed out 7 tricks to help you out.

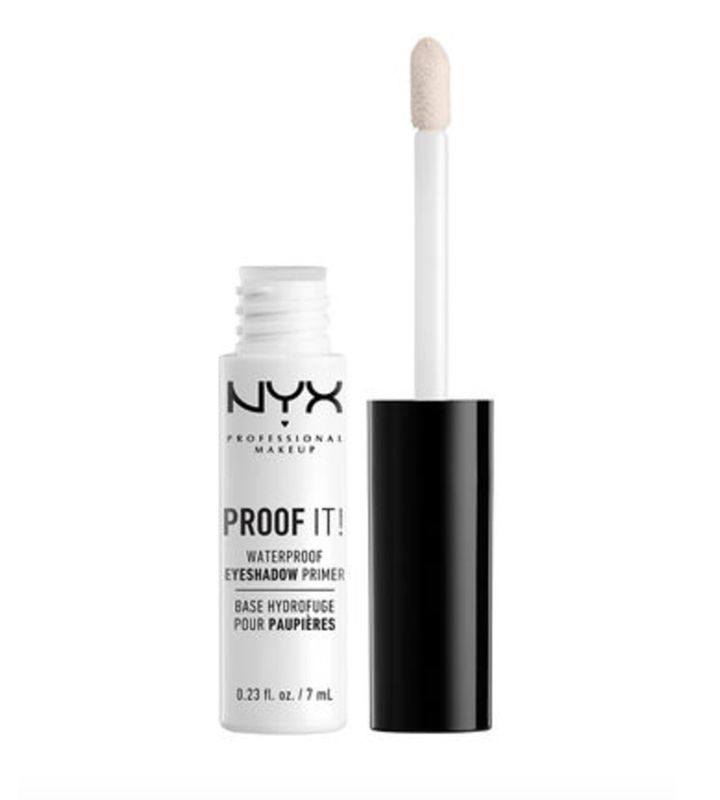
1. Prime Before You Start
Eye shadow primers are the true MVPs of the smoky eye. Use a flesh-toned or translucent formula all over your lids before beginning the process. Not only will a primer lock down the shadows and prevent them from smearing, but will also make the colours look richer.
2. Line Away
As it turns out, smoky eyes aren’t only about eye shadows. Use a creamy eye pencil to draw a line along your upper lids. Try staying close to the lash line and increase the thickness as you move outwards. Don’t worry if the line isn’t perfect as you are going to blend the colour out soon.
3. Pick The Right Tools
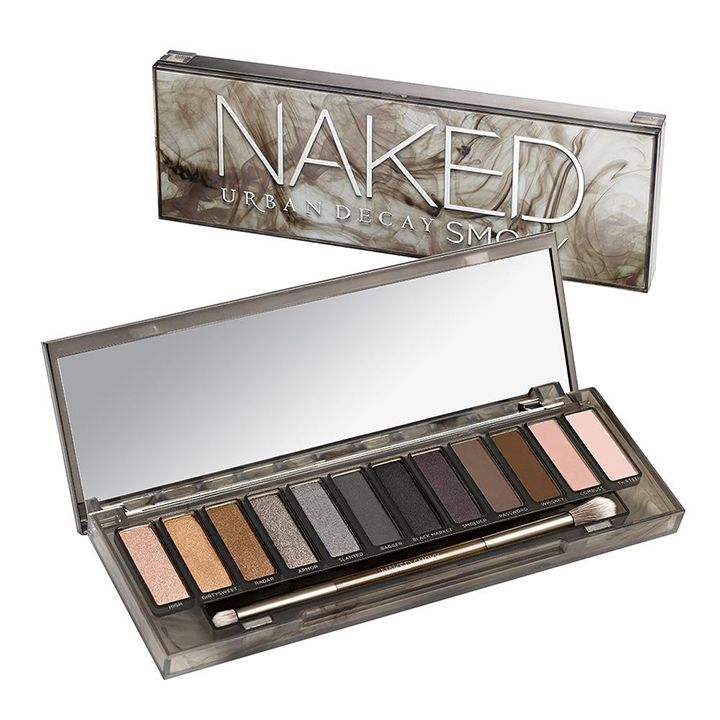
Speaking of blending, it’s important to use a brush with soft, fluffy bristles to help smudge the colour correctly. Whilst there are special brushes for smoky eyes, you can use a small, domed brush or crease brush to buff the colour in. For the base colour, it’s best to use a flat brush.
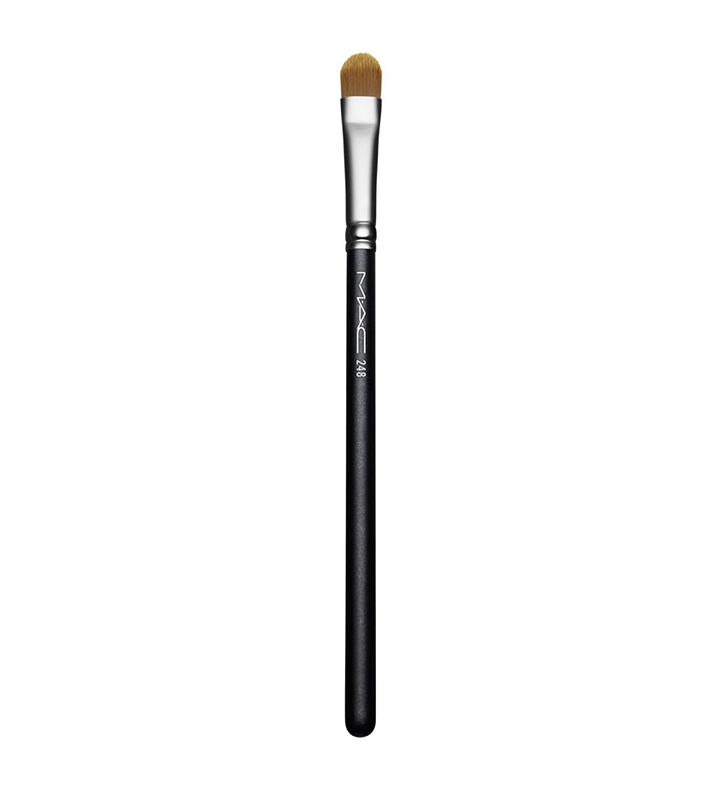
As for the eye shadows themselves, try sticking to cream formulas for the base. These go on smoothly and blend beautifully. You can layer on powder shadows later to intensify the smokiness.
4. Remember The Method
Placement is everything. Use the lighter shade all over your lids first. Rather than sweeping the colour on, pat the shade on to ensure that it stays put. Then, use the fluffier brush to buff the shadow and liner together.
Next, dip the flat brush brush into the darker shadow and use pressing motions to apply the shade on to the outer corner of your eye. To stop your smoky eye from entering raccoon territory, keep the shadows close to the lash line.
Remember to blend all the colours so that they appear seamless. If you find that the smokiness is too subtle, add more of the darker hue with the flat brush and keep blending until you get the desired effect.
If you aren’t confident about using different colours, you can create the same look with just one shadow. First, apply one coat as the base. Then, keep layering the colour on the outer edges to deepen the pigmentation.
5. Mix It Up
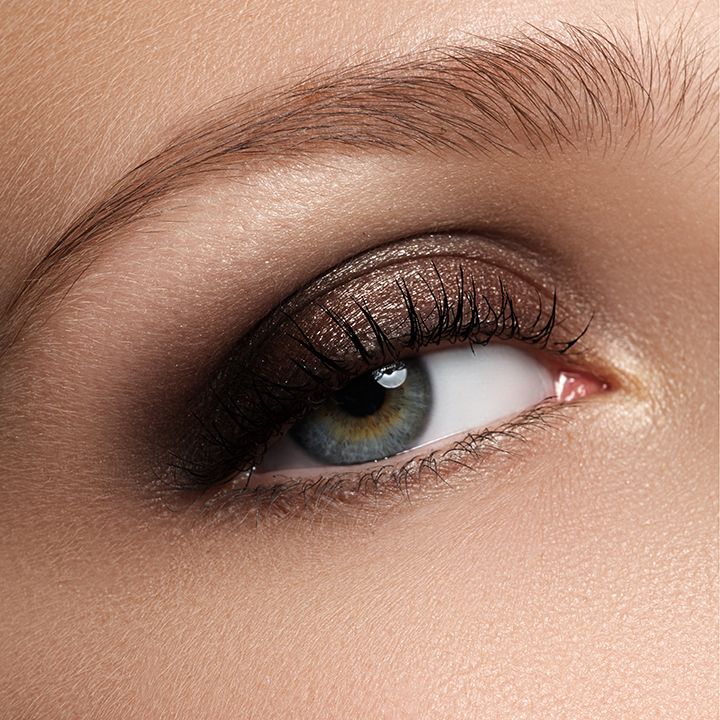
When it comes to smoky eyes, our minds go straight to black. However, you can create this effect with any shade – be it blue, emerald or purple! For a more daytime appropriate look, you can use an array of bronze, copper and brown.
6. Add Shimmer
Nothing can open up your eyes more than a hint of shimmer! To ensure that all those dark hues don’t make your peepers look small, dot a tiny amount of gold or silver shadow right above your iris. You can even use a highlighter on the inner corners of your eyes to get a similar effect.

7. Clean Up And Lash Out
A little fallout is inevitable whilst creating this look. Dip a Q-tip in some makeup remover or use a makeup wipe to gently clean up any residue. Once you are satisfied, apply 2 coats of mascara to finish up your look. In general, it’s smarter to do your eye makeup first and then the rest of your face, so that the fallout will not mess up your foundation.

We hope you found this guide helpful! Don’t forget to tag us in your smoky creations.
P.S: Follow @missmalinifashion and @missmalinibeauty on Instagram for more updates.