Remember when tucking in your shirts was reserved for formal occasions or are you getting flashbacks to when your school teachers would yell at you to neatly tuck in your school uniform? I remember when leaving everything untucked was super cool and rebellious. Now we’ve made a return to tucked in tops being fashionable, but oh no this isn’t just the traditional full tuck. Right now there are so many more trendy ways to tuck in your shirts and look super fashionable. If you aren’t employing one of these methods when styling your outfits you are definitely left behind.
Some new techniques have been game-changing, cue the French tuck—Thanks Tan France! While I wasn’t much of a tuck-in my shirt sort of person, I’ve truly come to love the different ways to tuck in tops of all kinds, even sweaters. Especially since high-waisted silhouettes are all the rage right now, tucking in my tees, shirts or blouses even into my jeans is a fantastic way to look more polished and look like you put some effort into your look. Not to mention, we have seen these styles used on the runway many times including on street-style stars. These influencers have become pros with styling and tucking techniques. So while some styles might seem more challenging than others we’ve listed some easy steps on how to achieve the tucked-in style of your dreams. I guarantee if you keep practising you’ll be a pro in no time.
Check out how to effortlessly tuck your tops like a trendy street-style fashionista:
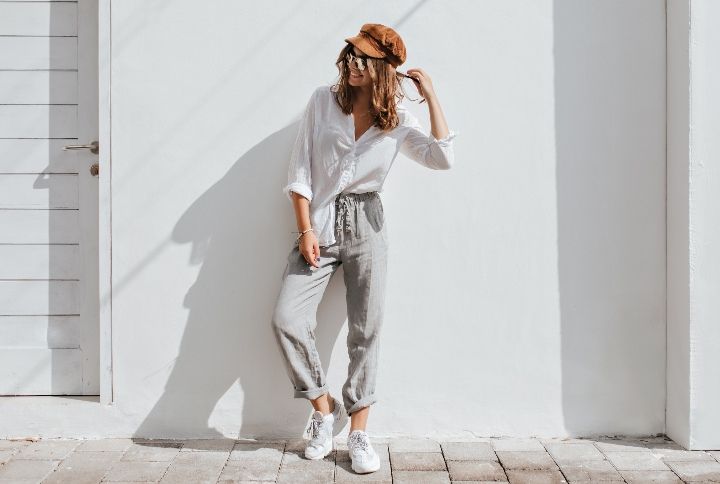
1. The Full Tuck
Let’s start with the classic and most straight forward method, the full tuck! While most of us already know how to do this we often forget the smaller details that make all the difference when tucking your shirt that you need to pay attention to. So while tucking your shirt all around instantly gives a more sophisticated look to your ensemble it’s essential to avoid any bulky bulges or bumps. Especially with high-waisted silhouettes and mom jeans being super popular at the moment it’s time to embrace this trendy easy to do style if you haven’t already.
- Start by tucking your shirt or tee at the front then move your way around and do the same
- Smooth down and push all the excess fabric as far down as possible to avoid bulking up.
- If your top is too tightly tucked in, raise your arms above your head. This will untuck just the right amount of fabric.
2. The Secret Faux Tuck
You might have seen many influencers and fashionistas tuck in their bulky sweaters with slinky skirts, minis or even super tight pants and wondered how on earth they did that? On your first try, you might have had no idea how to avoid the obvious bulkiness that came with the excess fabric in thin or very tight bottoms. Well, the secret to this is a simple well-hidden belt. Shocking right? The trick is also really quite easy, so try it with your favourite sweater or bulky top and silky skirt.
- Get a thin belt as close as possible to the same colour as your top.
- Wrap the belt at your waist and cinch it over the top of your sweater at the height you want it to be tucked in.
- Start gently pulling the fabric up from under the belt. You can loosen it to your desired length but make sure at least a few inches remain below the belt.
- With the fabric overlapping, adjust as needed to conceal the belt and ta-dah! No more ugly lumps!
3. The One-Side Tuck
This way of tucking in your tops is probably one of the most popular ones on our list. Seen from runways to street style looks you can’t avoid this just like the full tuck. It creates a cool undone vibe that’s very trendy right now. The easiest and most versatile option for this is a button-down shirt or blouse of your choice. If you have plain boring bottoms why not opt for a louder printed shirt for a more fun look on the weekends. It’s a great way to make even a frilly or stuffy type of top have more of an edge and added interest with some asymmetric lines.
- Unbutton your blouse or shirt from the bottom to the top of your waistband.
- Take the one side of the shirt with the buttons and tuck it into your bottoms.
- Leave everything else including the back left out, for a slightly polished but undone look.
4. Tuck, It But Tie It
If you want a simple version of the stylish knotted look without going the cropped route or buying a pre-styled version this is a great method. This is a fun way to add some interest to your boring shirt or blouse and one of the easiest on this list. Works best with a long button-down shirt.
- Undo two or three buttons at the bottom of the shirt.
- Start by tucking the back portion only. Leave the front as is.
- Take the front ends and tie them into a loose knot. You can tie the knot closer to one side of your waist instead of the front to keep it interesting.
5. The Sports Bra Trick
Who knew a sports bra could be such a useful tool to tuck in your tops. This works great with tops likes sweaters and t-shirts of a longer length. When playing around with this hack you can experiment and twist your top at the front or sides and tuck it in for a cropped look as well. Here we’re going to show the simplest technique to get started.
- Wear a sports bra under your long shirt or tee.
- Take the edge of the hem and stuff it in gently into the base of your sports bra.
- You can keep tucking it in to adjust it to the length you need. Make it longer or shorter according to your preference.
- Don’t forget to tuck in the back as well for a more seamless put-together look.
6. The French Tuck
Also known as the Front tuck, the French tuck was popularized in mainstream media when Tan France from Netflix’s Queer Eye used the phrase in the show. All of a sudden everyone was French tucking their outfits. It’s a simple yet effective way to look a little slimmer and more put together compared to leaving your shirt undone. Especially if you don’t want the stiffness of a formal full tuck. If you haven’t mastered how to do this yet, you’re in luck we’ve provided you with an easy method. Also, this is especially effortless to do if your button-up has those side slits that separate the front from the back. It allows you to easily tuck in the panels smoothly and neatly all around.
- Take only the front of your blouse and tuck it into your pants.
- Leave the back end out and loose.
- The key here is to loosen the front just a little bit. It should slightly spill over the waistband and giving a more relaxed look.
7. Backend Tail
A lot of stylists use a similar trick to tighten or adjust an outfit in the back with a clip for photoshoots. However, in this case, we’re creating this a simple tuck in the back with no bulges in the front.
- Start by pulling any excess fabric to the back.
- Begin to twist the material in your hand into a tail.
- Hold tight and tuck in the twisted fabric into your pants or your underwear for a better hold.
8. Tuck It In Your Tights
More suited for those cooler days, this trick employs the use of your tights or stockings. This trick works wonders if you are wearing a high-waisted skirt. By doing this method you don’t need to worry about your top coming untucked. Everything stays smooth and it gives the entire ensemble a more polished look where the skirt can be showcased instead of being covered by a loose top.
- Start by tucking your top into your tights or stockings before wearing your skirt.
- Make sure to push down and smooth down the excess fabric as much as possible.
- Now wear your skirt on top. If your top is tucked in too tight raise your hands and this movement will slightly untuck the right amount of fabric.
- Adjust as needed and style!
9. Ankle Tie Trousers
When this trend exploded on the scene it left most of us scratching our heads on how it was done. It looked straightforward but a little complicated to do and have a fashionable end product on ourselves. So if you haven’t quite figured it out yet, here’s how to accomplish this look that does actually require some tucking in.
- This works best with lace-up sandals. It needs to be the ballet-style, lace-up kind of straps or spiral straps.
- Get a pair of wide-leg or elongated trousers that hits at the length you need.
- Slowly start to wrap the lace over your pants and around your ankles where it holds on to the bottom excess material.
- Adjust the hem to your liking and secure your sandals.
Tip: Alternatively, this can also be done with buckle heels paired with narrower pants. And TBH, depending on the style you’re going for, especially with tie-up laces, it might take you a few tries to perfect.
What hack are you most excited to try and which one did you find most useful? Let us know in the comments below.
Don’t forget to follow @missmalinifashion for all the latest style updates!