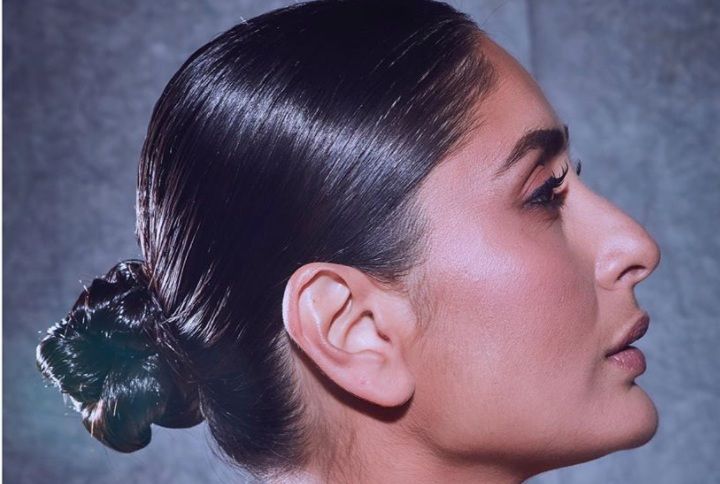
Hairstyle trends come and go every season but the hair bun is timeless, never going out of fashion. It’s more relevant than ever in our current climate where we all are wearing a face mask every day. No one wants to be fussing around with our hair when stepping out of the house. It’s all about being comfortable and since we’re lacking out on our hair appointments many of us including celebrities are gravitating towards low-maintenance looks. Braids, ponytails, messy top knots easy effortless looks are the way to go. Updo hairstyles aren’t new and neither is the wet hair trend as we have seen them countless times on celebrities and runways. However, a sleek wet bun is a lot chicer than a regular or messy style bun.
While the wet shiny hair might seem intimidating to recreate on your own, it’s actually easy enough to replicate. You don’t need a professional stylist for this versatile look that works great all year round. Whether you’re creating a side part high or low bun the basic technique is the same. Follow the easy steps below to master the wet hair bun for yourself.
Keep scrolling below to check out how to do an effortless chic sleek or ‘wet’ hair low bun:
Products you will need:
- Teasing/back coming boar bristle brush
- Comb
- Hair ties
- Bobby pins
- Hair gel or pomade
Step 1: Prep your hair
This hairstyle works best with a smooth base so once you wash and condition your hair well comb them out and dry them. You can leave your natural hair if you prefer but if you want a sleeker look blow dry your hair to make them as straight as possible. Remember to use a heat protectant and anti-frizz serum especially if you have curly hair. This will help tame them and make it them easier to work with.
Step 2: Choose your style
Know what style for you’re going for. Is it a high or low bun and how do you want to part your hair? For a style that looks great on any occasion simply comb your hair back without a part. For a more structure look comb a side or middle part and flatten your hair on each side of it. Do this step once your hair is completely dry.
Step 3: Apply gel or pomade
The most common technique is to use a hair gel but you can even use regular men’s hair pomade. I’ve found that for some the hair gel works better and for some a pomade. So it’s up to your personal preference. If you’re having trouble brushing back your hair, use a backcombing brush to help create a clean finish. The soft bristles can help smooth back your hair and evenly distribute the product without creating any bumps.
If you’re using gel:
Choose a styling gel that has good hold. First, warm a dab of gel in your hands then apply it to the sides of your hair to keep the part in place. Make sure you don’t use too much at first, you can add more later if needed.
If you prefer pomade:
Take some product and layer it section by section if over your hair to saturate every strand so it lays flat. You can even comb out the hair to distribute the pomade evenly The pomade will slick the hair down without any crunch and flakes keeping everything in place until you wash it out.
Step 4: Pull it back
Once your part is in place, pull all of your hair tightly back where you want it to sit. Brush your hair through to smooth out any space or bumps from the front to back. Once you’re happy with the appearance continue fastening it on the back with a hair tie. Then twist the ponytail tightly and wrap it into a bun. Secure it with a rubber band and bobby pins.
Step 5: Finishing touches
Take a step back and add in any finishing touches if needed. Add on a dry oil or finishing spray to keep the shine on all day. Fix any flyaways with the gel/pomade and you’re good to go! If you’ve got a special occasion to go to it doesn’t hurt to spray a bit of hairspray to keep it extra secure and in place all night.
What do you think of this sleek low bun look? Let us know in the comments below!
P.S: Follow @missmalinifashion and @missmalinibeauty on Instagram for more updates.