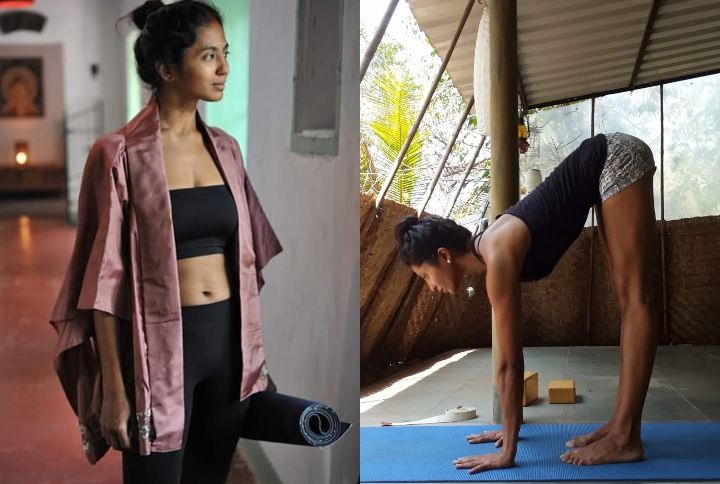
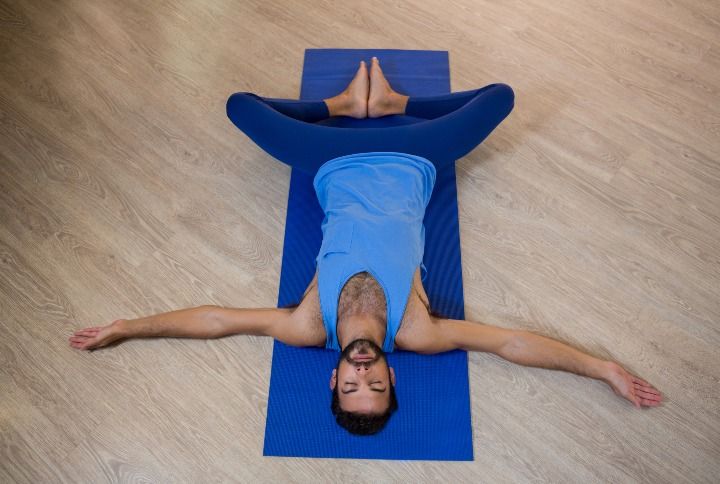
Is it just me or do y’all feel like your back is hurting more than ever in this lockdown? Maybe its because we’re all working from home and not all of us have the right chairs to sit and work on. Some of us sit on our beds in positions that are bound to cause us back issues, and all of this for extended period of hours! And so, I knew I had to do something about this. I got in touch with a professional Yoga instructor—Sharanya Narayanan to help me with my back issues. And she suggested 12 yoga poses that will strengthen both my back as well as the pelvic zone.
Sharanya is an Iyengar and Hatha Yoga practitioner and teacher. In this blog, she has mentioned which 12 yoga poses help best in improving the back and pelvic zone strength along with tips on how to deepen your practice. She says there is a specific way that we engage the muses so that the pelvis and the back provide support (salamba) to each other. Scroll down to read all about it!
1. Supported Bridge Pose
Also known as Salambha Setu Bandhu Sarvangasana
Can be done with or without a block under the tailbone
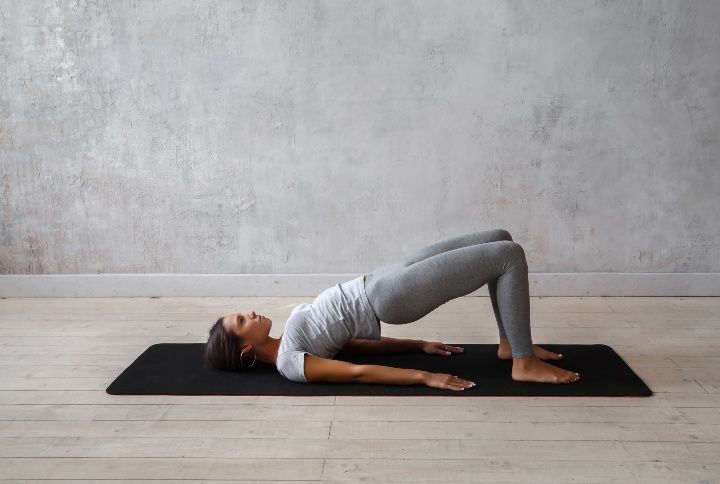
Remember to engage your buttocks before you attempt to lift your hips and pelvis off the floor. This will provide the necessary stability to the posture by tilting the pelvis and tailbone together. Especially to the lower back. If you feel like this is difficult, place a block under your tailbone for additional support as you continue to engage your buttocks. This will allow you to strengthen the gluteus muscles in the buttocks without the added strain of self-supporting your spine.
2. Reclining Bound Angle Pose
Also known as Supta Baddha Konasana
Can be done with or without a belt across the lower back and the ankles
This is a reclining pose and allows one to take their time in it. It allows the hips and pelvis to open more freely. As you drop the knees down to either side, it is important to make sure that your lower back does not over arch or lift-off too far away from the floor. Try to bring your heels as close to your perineum as possible. A belt can be very helpful here to literally ‘bind’ you into place, drawing the heels up towards the pelvic floor and the tailbone down towards the heels. Remember, the goal of the asana is NOT to push your knees down to either side but instead to allow the hips to loosen which allows a natural descent of the outer things towards the ground.
3. Cobra Pose
Also known as Bhujangasana
In this pose, it is important to focus on the position of the lower back. Try to engage your buttocks to create a tilt in the pelvis which gently raises the stomach away from the ground. When you feel the shift, you will be able to safely maintain this pose without bringing the strain into the lower back. It is also good to be able to train yourself to always move the tailbone and the pelvis ‘in step’ with one another.
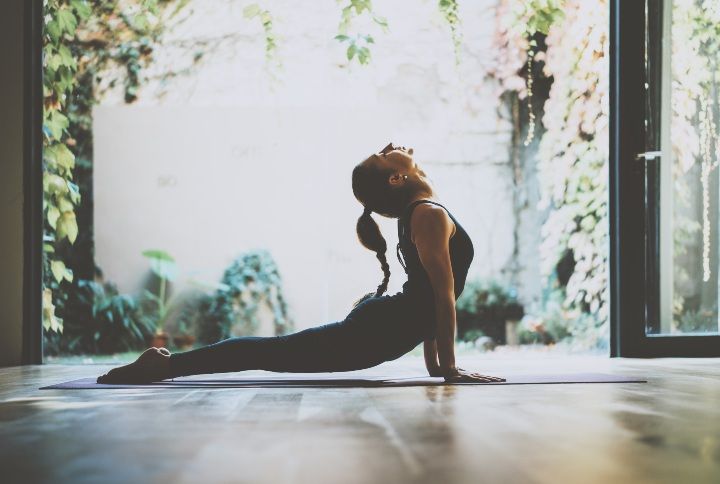
4. Upward Facing Dog Pose
Also known as Urdhva Mukha Svanasana
Can be done with or without a bolster under the thighs and pubic bone
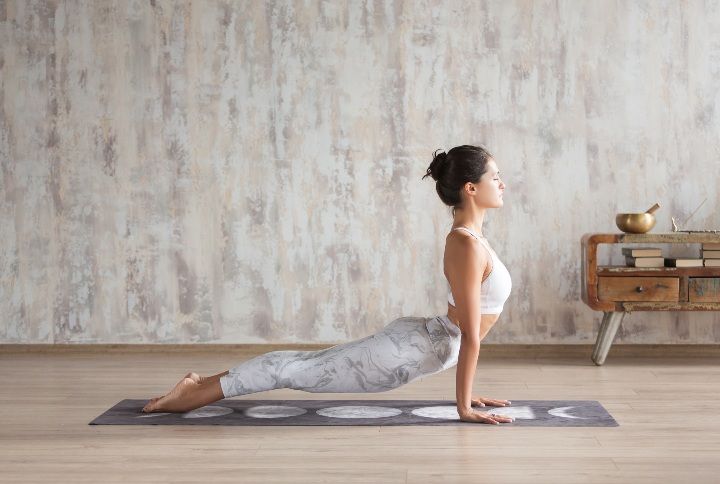
The upward-facing dog pose can be quite challenging for those who are not so flexible. However, it’s the perfect pose to help strengthen the back muscles and initiate greater flexibility. For those feeling challenged by this yoga pose, try placing a bolster or a stack of blankets as a support under your pubic bone and the top of your thighs. Continue to engage the buttocks and try to see if you can apply the idea of tilting the pelvis as described in Setu Bandhu Sarvangasana.
5. Locust Pose Variations
Also known as Salabhasana
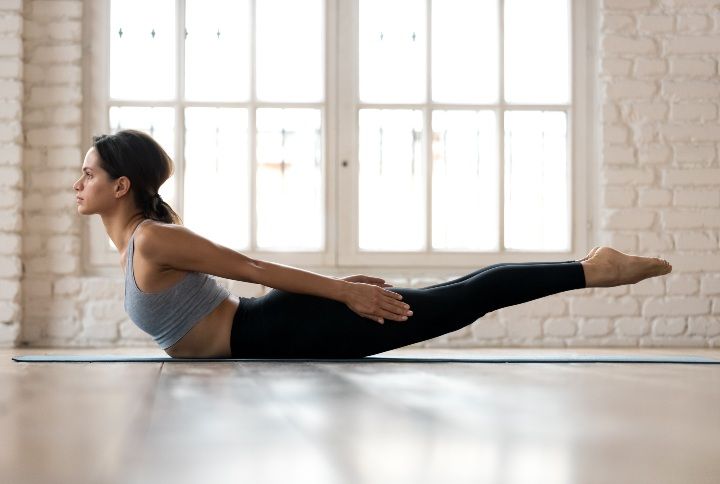
The locust pose is a fantastic back muscle builder. Here, Sharanya suggests starting by engaging the buttocks, engaging the thigh muscles, and then lifting off. Think more about lengthening the back of the body rather than getting it to lift further off the floor. Lengthening the body will allow the muscles to do their job more safely without disabling the pelvis and straining the lower back. Eventually, with more practice, one can attempt to raise the arms and legs higher off the floor.
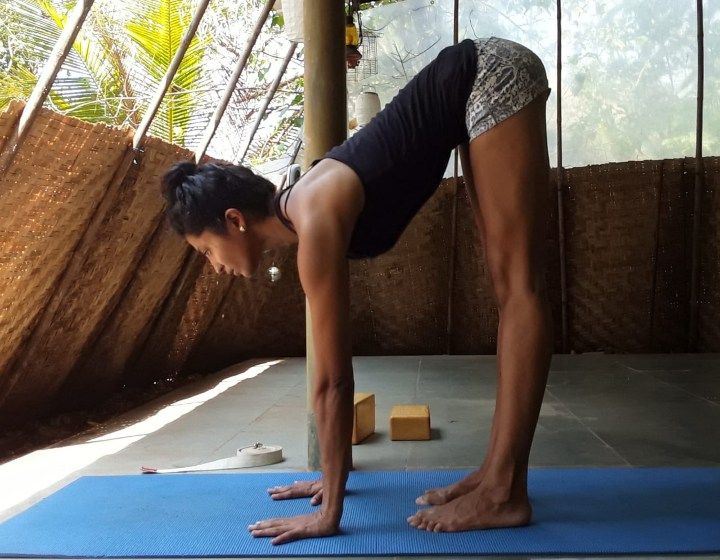
6. Supported Downward-Facing Dog Pose
Also known as Salambha Adho Mukha Svanasana
Can be done with heels up against a wall
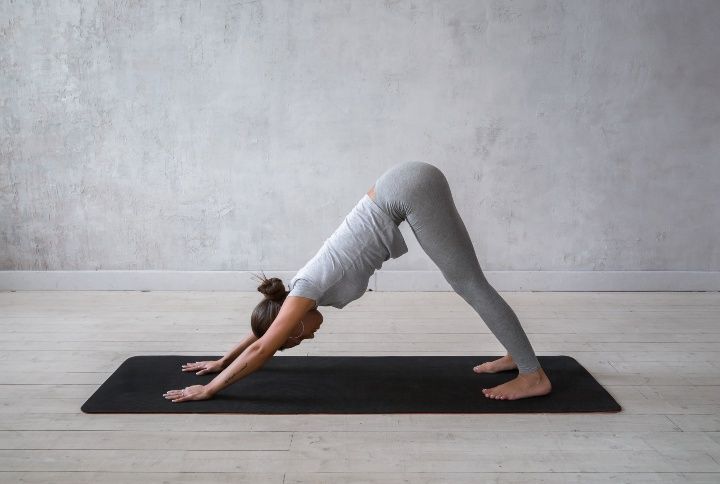
The downward dog yoga pose is meant to be a position of rest, where one can calm the mind and relax the nervous system. Bringing the heels down into the ground is one of the goals but not the best way to start moving into this pose. Instead, Sharanya recommends raising your feet up against the wall at an angle so that your heels make contact with it. This allows the calves and hamstrings to stretch evenly. It also raises the hips and pelvis together, allowing the lower back to lengthen freely.
7. Warrior 1 and 2
Also known as Virabhadrasana 1 and 2
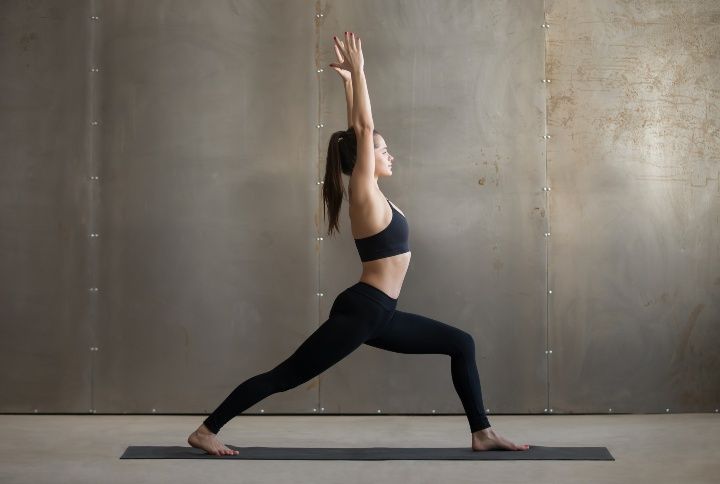
Warrior Pose 1 By fizkes | www.shutterstock.com
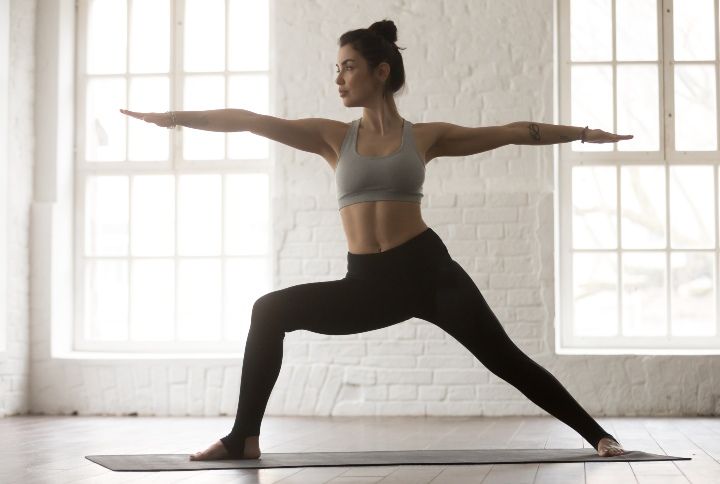
Warrior Pose 2 By fizkes | www.shutterstock.com
In both these variations of the Warrior Pose, we see the lower half of the body take charge. When the tailbone and the pelvis are centered, the hips are able to support the lower back and the spine more efficiently. If the pelvis is falling forward too much then the lower back will over arch, causing a lot of pain. Try to make sure that you engage your buttocks to reduce the arch in the lower back. Both these asanas are only effective when the lower body is strong so that the upper body feels light.
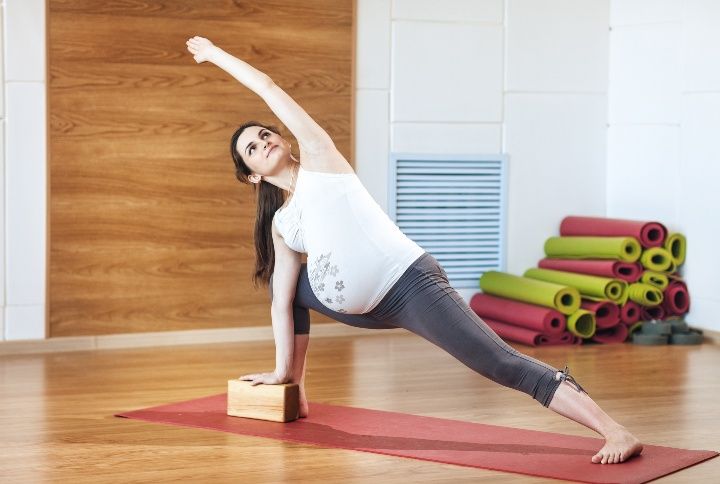
8. Triangle pose
Also known as Trikonasana
Can be done with or without a block
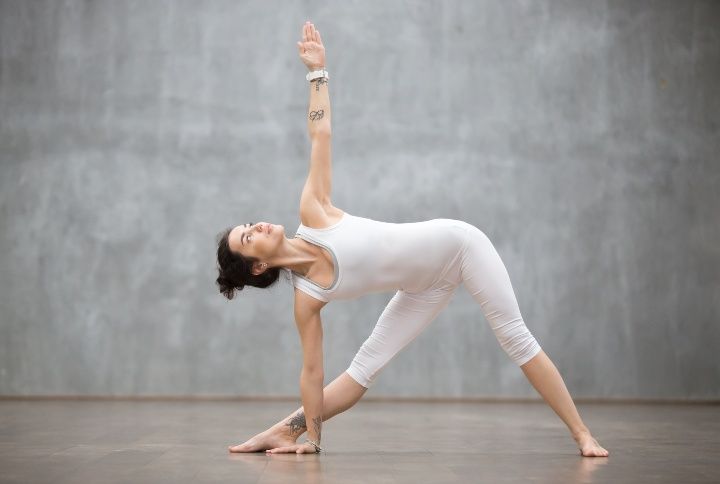
The triangle pose is one of Sharanya’s favourites! Depending on how flexible you are feeling, you can attempt this asana with the help of a block. Let’s say you lean into the right side. That would bring your right hand towards the floor. When the body is not ready to move so far as to bring the hand all the way down, then you place a block under your palm. This will raise the body back to a stable angle, one it is capable of maintaining without causing additional strain. This will allow you to bring the hips forward into alignment and therefore lengthen out the lower back. Being a standing pose, it always helps to make sure that your thighs and buttocks are engaged for better balance.
9. Side Angle Pose
Also known as Parsva Konasana
Can be done with or without a block
Similar to Trikonasana, this yoga pose can also be done with the help of a block. Here, engaging the buttocks makes all the difference to one’s balance and to keep the inner thighs and hips expanding outwards, without overarching the lower back.
10. Reclining Hand To Toe Pose Variations
Also known as Supta Padangushtasana
Can be done with a belt and a bolster
The reclining hand to toe pose can be done with or without the help of yoga props. However, even to those who are experienced, Sharanya advises working with a belt and a bolster from time to time as it allows us to accurately assess how we move into it. Before lowering the raised leg down towards the ground, it is important to note that the opposite side plays an equally important role in allowing the body to transition smoothly. It acts as a measure of counterbalance, so that the hips, lower back, and pelvis can sit steady and not endure any excessive force.
Always engage the buttocks before allowing either leg to move in an outward position. A belt allows one to maintain contact with the raised leg and a bolster can be used to create a raised support for the leg when it is lowered down to either side. This support, in turn, prevents the opposite side of the body from getting displaced, therefore securing the pelvis in a grounded way.
11. Supported Shoulder Stand Against The Wall
Also known as Salambha Sarvangasana
Can be done with blankets and a belt
The shoulder stand is one of the most effective poses Sharanya has come across. When practicing this yoga pose, try to be aware of where your body takes its weight into. Grounding the back of the shoulders and gently pressing down the back of the head into the floor allows the neck to remain stable and secure. This way one can make sure that the weight is not borne by the neck muscles and you can avoid injury. As an inverted posture, the spine and all the muscles in the body are given a break from their usual position. Here, we move against gravity and therefore the direction of weight shifts. The lower body becomes much lighter and the weight shifts towards the upper and middle back.
However, one still has to maintain a level of control in the lower body. As listed above, engaging the buttocks will support the tilt in the pelvis and prevent the lower back from overarching. Engaging the thighs will bring stability the legs. Placing blankets under the shoulders and the upper back raises the neck off the floor and takes the pressure off it. If your elbows are unable to stay grounded into the floor or keep slipping, try and secure your upper arms with a belt, such that the elbows can not open wider than the shoulder width. Then attempt the pose.
12. Supported Legs Up Against The Wall Pose
Also known as Salambha Viprit Karni
Can be done with a bolster under the lower back and tailbone
This yoga pose is also Sharanya’s favourite restorative asana. It allows the centre (lower back, pelvis, hips, and tailbone) of the body to relax completely. In fact, the angle of the pose allows the entire body to cool down in its natural alignment. The bolster is placed under the lower back and the tailbone to provide a soft landing while maintaining the natural curve of the lumbar spine. One can slow down the mental activity, calm the nervous system, and improve digestion with the help of this pose. All one needs to do is to go deeper into the breath and allow gravity to take charge of the body.
Hope these yoga poses helps you in working towards the strengthening of your back and pelvic region. Check out Sharanya’s Instagram page @sharanyayoga for more awesome yoga videos!
And don’t forget to follow @missmalinilifestyle for more interesting updates.